Assembly BLOG 2021-23
To go to the latest post click here.
Friday 30th April 2021
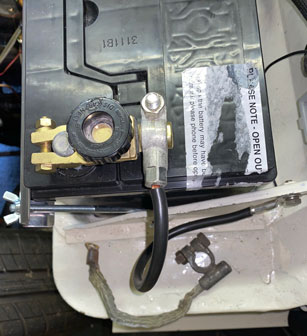
I've finally started on the car! First, the battery was shot, so I ordered a new one from Rimmers. It's a bit bigger than the previous one, and only just fits the battery box. Also it's a tad higher, and the earth lead won't stretch to the cut-off switch so I've also had to order a new longer one.
Saturday 15th May 2021
I'd previously fitted the new battery from Rimmers - it's the first I've had with the proper forward facing posts, so I had to order a new earth lead which is seen fitted above (with the old one for comparison). It certainly looks better. Toay I finally took the covers off and went for a short drive, ending up in Sainsbury's car park, as I needed to collect a prescription. Unfortunately I'd forgotten to bring a mask so after taking a photograph had to return home. Sadly the frequent showers had returned, so, as getting the car wet was unthinkable, I returned in the 'e'.
Monday 17th May 2021
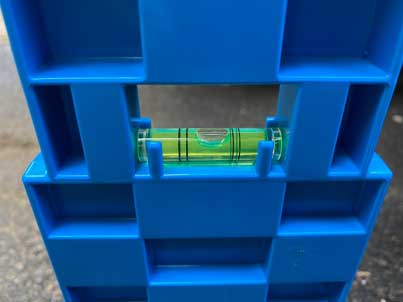
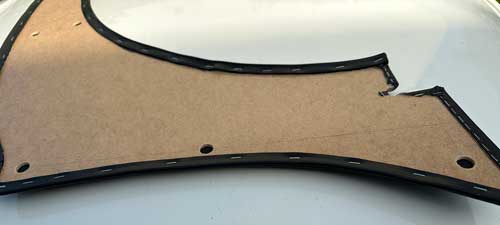
Today I finally started the interior carpet fitting - I've got a set of moulded carpets from Newton Commercials, which have been sitting for months on the bed in the spare bedroom (we've had no guests during lockdown). Following their instructions the first to fit are the Dash Side Carpets:
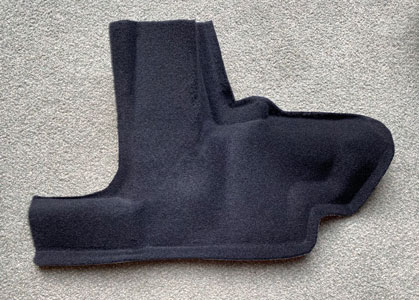
The location of the LH one can be seen below. The foot rest panel (black on first image) had to be removed for a trial fitting.
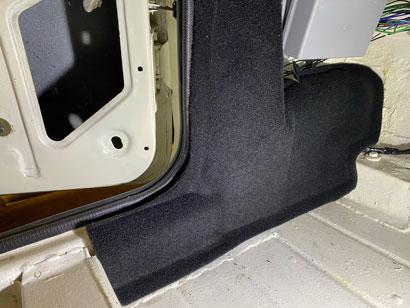
The carpet should be glued down (although it will be held in place by the foot rest and the door trim) but I've decided to try velcro, so I ordered a 25m x 16mm roll.
Unfortunately, and for several reasons, I haven't touched the GT6 since May. Also I have changed my PC from Windows to a Mac. My website program of choice, MS Expression is no longer available to me, so I have had to use Dreamweaver again and I've had to relearn it in CC form!
Recently I had an email from a friend who is going to make me a model of my GT6. He asked if I was going to refit my front bumper, as I've been driving around without one. I replied that I was, but I was going to remove the central section like the GT6 below:

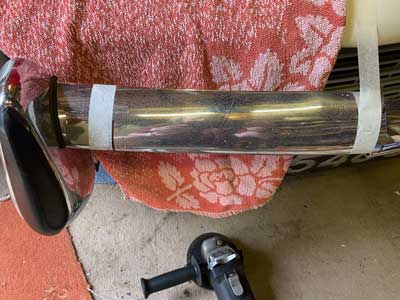
This made me get the old front bumper from the garage, remove the over riders, and clean it up.
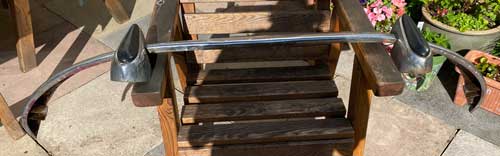
This I did on my back lawn in the incredible sunshine we're having at the moment.
As the over riders are very rusty I've ordered a couple of new ones from Rimmers. Then I will re-assemble it all onto the car, cut off and remove the central section, and send the two ends away for the cut off parts to be filled and then the whole rechromed.
Monday 19th July 2021
Today, having previously removed the two overriders, and cleaned up the front bumper with chrome cleaner I discovered that one of the threaded holes in the bumper had its bolt sheared off. I had to try to mount it on the pillar drill in the garage and drill the remains of the old bolt out, which I succeeded in doing. I then cleaned all six of the mounts with a 5/16" UNF tap. I now need to buy six 5/16" x 3/4 UNF set screws to refit the bumper, and two 3/8" x 7/8 UNF set screws to fit the over riders. I'll get stainless steel ones as they are not load bearing. I've also contacted ST Chroming in Bristol to see if they can rechrome the bumper ends after I have cut out the centre section. They will also need to fill in the cut ends prior to rechroming. They will be able to do this, so I can continue!
Tuesday 20th July 2021
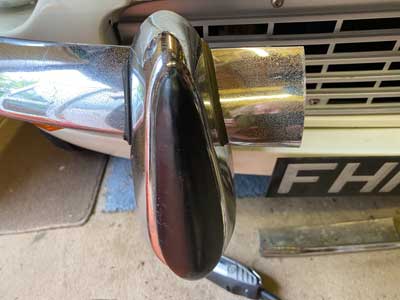
Today I received the new over-riders from Rimmers (impressive service, as usual):

A very impressive facsimile of the original!
Wednesday 21st July 2021
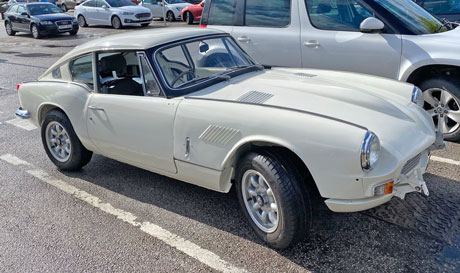
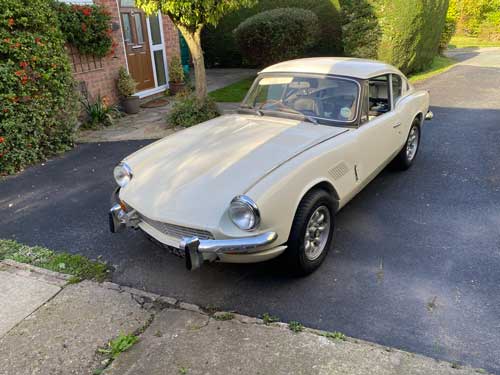
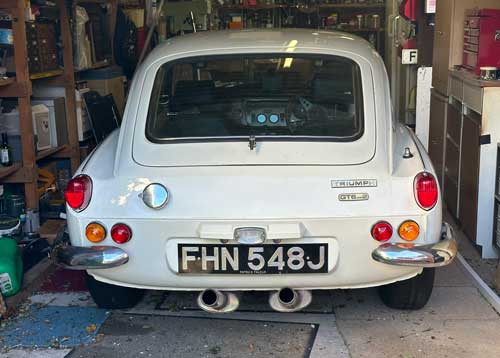
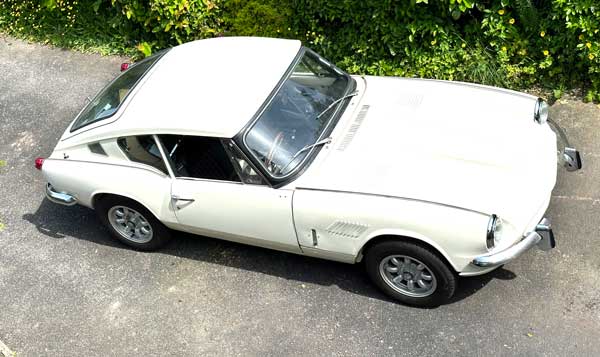
I'm still waiting for the bolts to fix the front bumper in position. Meanwhile, I got the car out of the garage to photograph it for the TSSC valuation, as the insurance becomes due at the beginning of next month. I gave it a quick wash, as it was a little dirty! The heat of the sun should dry it out - otherwise I'm relectant to get it wet! Afterwards I cleaned the roof; on some parts near the sides there was a little overspray from the aerosol adhesive I used to stick the headlining, this I successfully removed with WD40. I then T-cutted a couple of scratches and polished the whole roof with a wax polish.
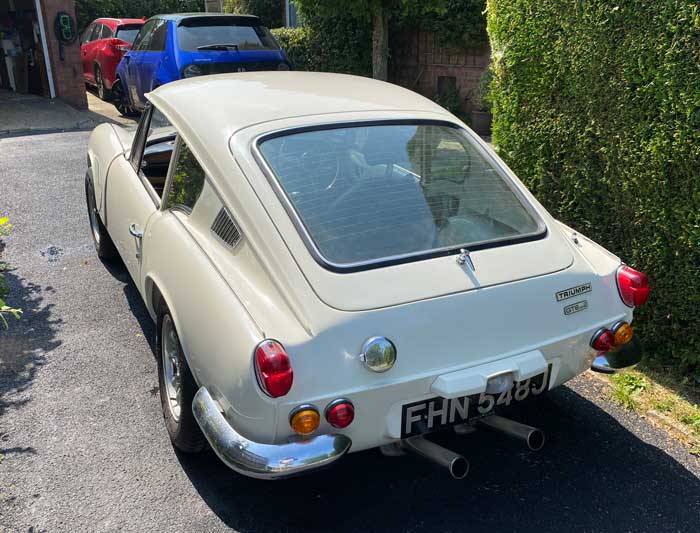
The carpets still need fitting, also the door cards (and rear side cards) and wing mirrors. It'll be interesting to see what valuation The TSSC give it, as values are on the up. I'd say around £12k to 15k in its unfinished state, certainly more when completed.
Saturday 24th July 2021
I had a shock a couple of days ago, when I learned that my old friend Tony Smith, who helped me install the 2.5L engine in the GT6 back in December 1980, died suddenly a couple of weeks ago of heart failure. He was a bit younger than me as well. We were best men at each others weddings. My condolences go to his poor family.
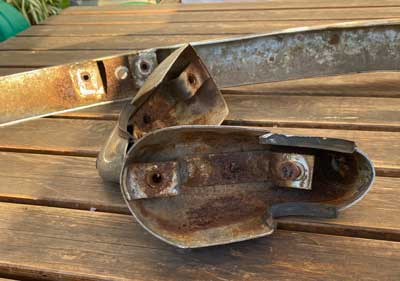
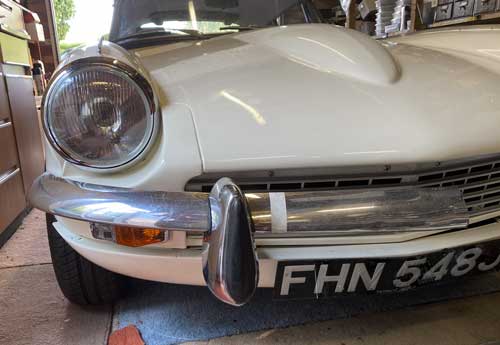
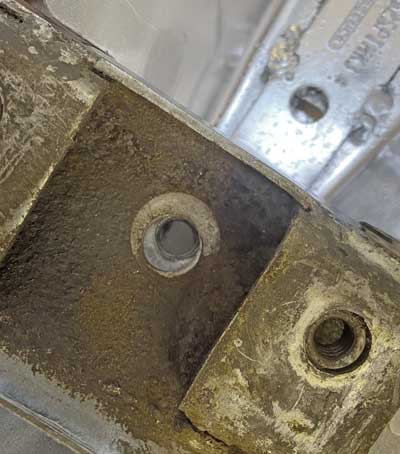
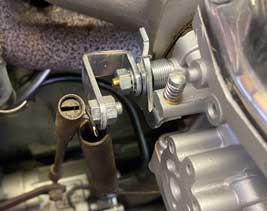
The front bumper bolts arrived, and I made an attempt to reconnect the front bumper. However after loosely attaching the right hand bumper bolt to the bonnet near the side light, I discovered that the bolt holes on the LH bonnet hinge brackets did not coincide with the holes in the bumper, they were about half an inch out (see picture below). When Southside sprayed the bonnet they had a lot of trouble fitting it, and somehow the hinge brackets must have been bent out of true in that the distance between them has increased.
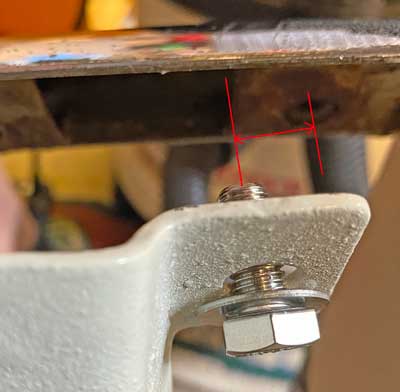
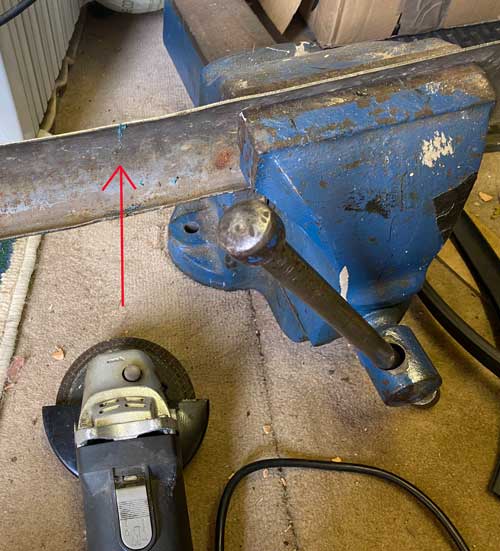
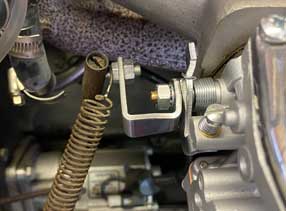
The first solution I thought of was to ovalise the holes (1/4" each side). However, as it was the distance between the hinge brackets which had increased, and as I intend to remove the central section of the bonnet, the easiest solution is the cut the bumper in half! I don't want to do the final cuts until its all in position so I can judge better where to cut. Also, the experience of cutting the bumper in the middle will serve me when doing the final cuts near the over riders. Below: cutting the bumper.
On the car:
Now I'll have to take it off again, to fit the over rider (as the hole in the bumper is inaccessible from behind!). The chrome isn't great, but I'll get STChrome to rechrome it.
Thursday 29th July 2021
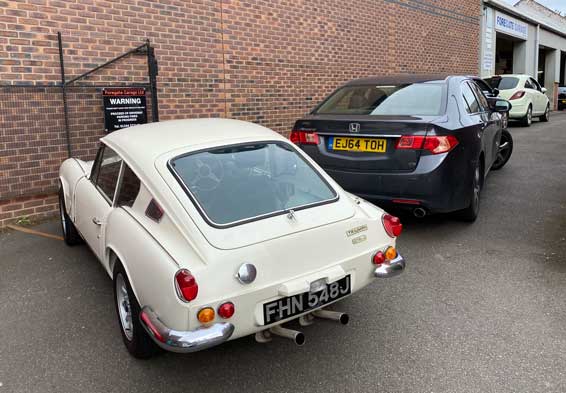
Good news from the TSSC, my GT6 has been valued at £18k, much more than I expected!
Friday 30th July 2021
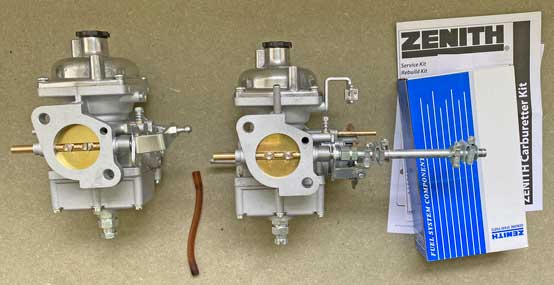
After a persistent fuel leak I replaced the fuel pipes near the carburettors, and the clips. However this had no effect, and I came to the conclusion it was leaking from the soldered joints of the fuel pipe assembly under the carbuettors:
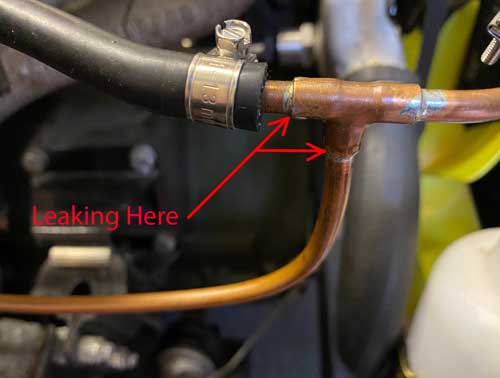
I therefore had to order a new one. TR Shop had one which looked like it was less reliant on soldered joints at about £30. It's a worry when supposedly "new" parts turn out to be less robust then the originals. This part was bought in 2017!
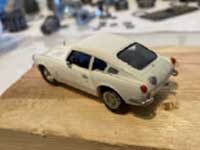
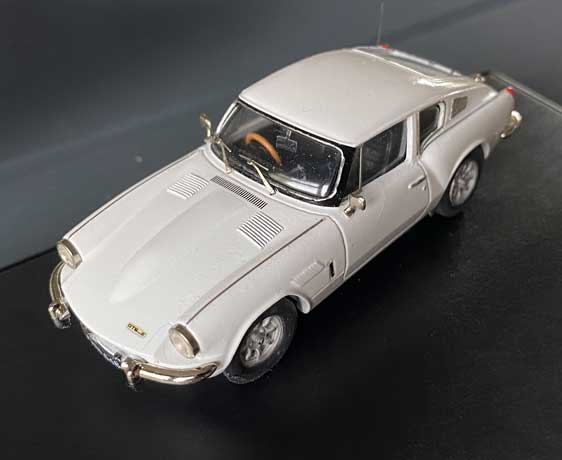
I have heard from my German friend that he is making around 140 1/43 scale GT6 models. I have ordered one for myself - it should look good on my bookshelves! As the Mk2 is 147" long (3.73m) the model should be quite small 3.42" or 87mm long! Here is an example below:
Tuesday 3rd August 2021
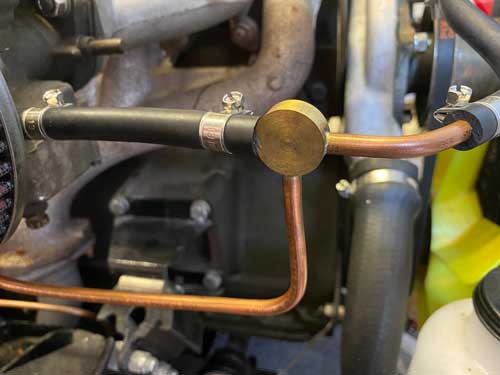
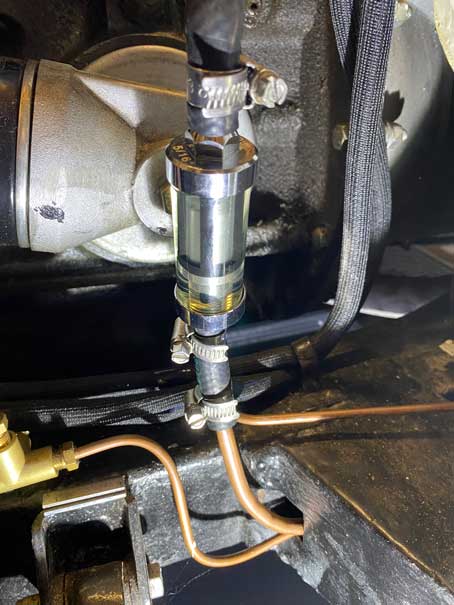
Received the new fuel pipe assembly from the TR Shop:
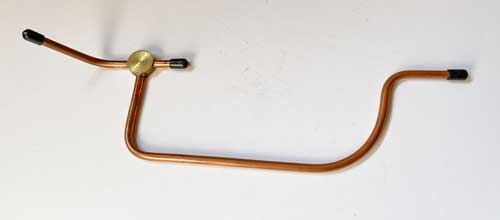
Fortunately it has fixed the leak:
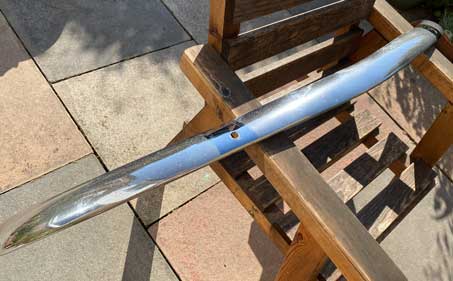
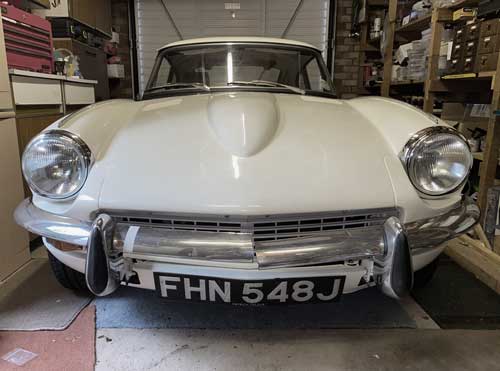
Also I managed to fit the RH front bumper. The tape marks where I intend to cut the bumper.
The best way, I found is to first fit the over-rider to the bumper with the 3/8" setscrew, then fit the bumper to the car (3 bolts behind the over-rider) and finally fit the 5/16" setscrew through the bonnet. The latter didn't want to engage until I extended the hole in the bonnet with a round file. The new over-rider I bought from Rimmers wouldn't fit at all. It may have if I had enlarged the hole in the bumper, which I wasn't prepared to do.
I'll return the over-riders to Rimmers for a refund, the old ones can be rechromed. I've ordered a couple of new grinding wheels for my angle grinder to cut the bumper.
Sunday 8th August 2021
First, Rimmers were very quick, refunding the money immediately on receipt of the overriders, without question. A superb company, which should be applauded.
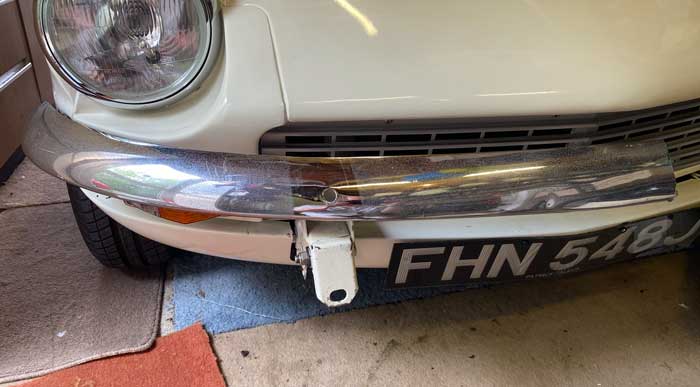
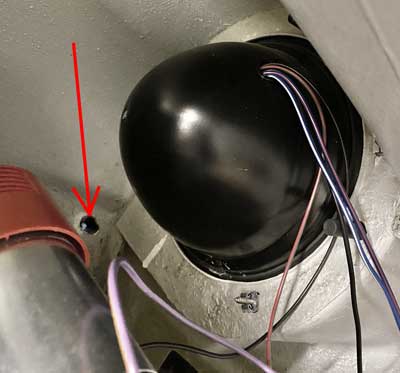
When I tried to fit the LH part of the front bumper I had a problem fitting the LH end to the bonnet. With the air horns occupying the space inside the bonnet, it was extremely hard to get the setscrew in my hands to go through the required hole (it was easier to photograph).
Also, the threaded hole in the bumper didn't line up, even filing a bit from the side of the hole.
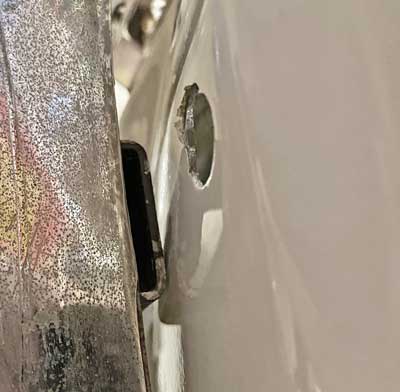
The above picture makes it look as if I'd filed the wrong side!
After going away to think about it, I tried a different tactic! I found a wooden dowl the same diameter as as the setscrew, inserted it into the hole in the bumper, and offered the bumper up to the bonnet. I could see straight away that another 3-5mm needed to be removed from the side of the hole which I did with my Dremel and a side abrasive rasp.
Then, I stuck the setscrew to a 5/16 socket on a long extension with bluTack.
Using a bright light in the bonnet cavity pointing towards the hole, I was able to get the setscrew through the hole and holding the bumper in position engage it with the thread. Bingo!!
A view of the whole bumper shows that each side is differently aligned - no way would it fit in one piece!
The next job is to cut the bumper around an inch (25mm) from each overrider. Then, dismantle it all and send it away to fill in the cut ends of the bumper and rechrome.
Saturday 14th August 2021
After returning from a few days in the Lake District I got out the angle grinder, fitted a new grinding disk (a Bosch designed to cut steel) and tackled the front bumper.
RHS done, just dressed the edge with the Dremel. Below, both sides now done. I think it does improve the look of the car, exposing the lovely aluminium grill.
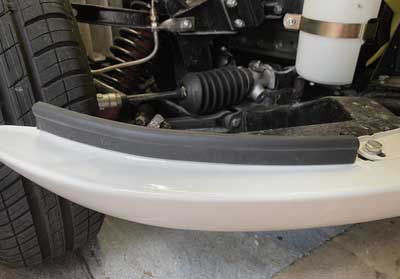
Next I fitted the front valance corner seals.
A nice day presented itself, so I got the car out of the garage. and drove it around the block. Considering it hadn't been driven for a while, it ran quite sweetly.
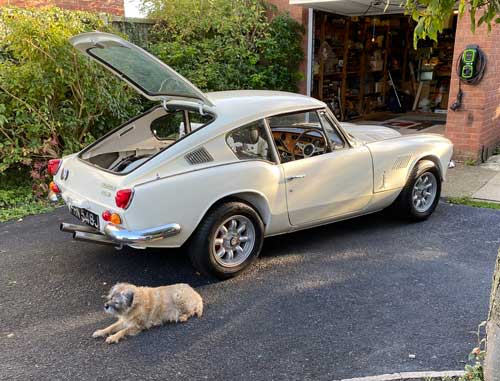
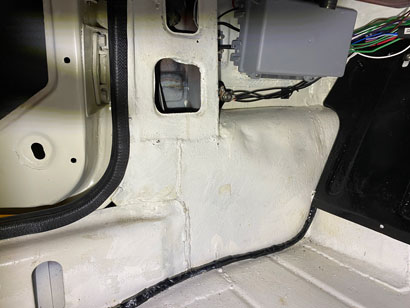
I then made a start with the interior insulation (with the help of Cleo, above right), using Dynamat. I started with the rear n/s wheel arch seen below, before and after.
Friday 11th February 2022
Not yet started on the car (too cold) but received an amazing model from my German friend - accurate in every detail. Even the Motolita wood-rimmed steering wheel, Minilite style wheels and split front bumper are reproduced!
Sunday 15th May 2022
A nice warm afternoon, so I got the car out of the garage (not the first time this year, it had a brief 1 mile drive on 20th March - see my Instagram page). However this time I actually did some work! My friend Steve Harris (On The Air) is having his 70th Birthday party at Hawarden Castle on the 28th, and it is a "bring your classic car" event! My poor little car is nowhere near ready, as I have been devoting my time to the house and my wife who has not been too well. However if I can forget the interior trim, but just fit the passenger seat, seat belt and make sure the car is roadworthy, hopefully my wife and I can take it to Hawarden. I know the front tracking is out, and the garages I have tried so far have been unable or unwilling to set this (although Buckley Tyres have been recommended). I may try to improve this myself as Buckley is a long way to go, watch this space. I drove the car 'around the block' and it seemed to go alright, in fact it is quite lively! However it stalled at a junction, although after arriving home it ticked over nicely on the drive. Checking the brake fluid it had dropped significantly, I'm not sure why. Fortunately I still have plenty of Silicone Brake Fluid to top it up with. There is also signs of a slight oil leak from the engine, although the dipstick showed it to be still up to the normal level.
Tuesday 17th May 2022
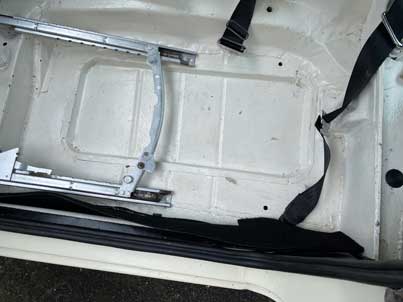
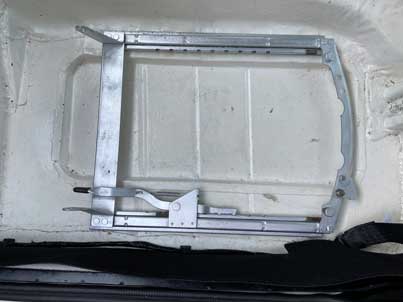
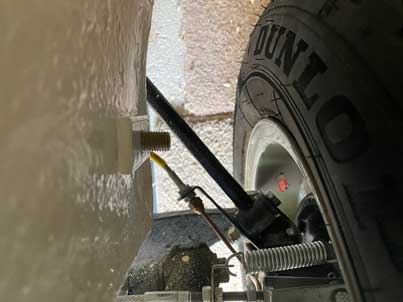
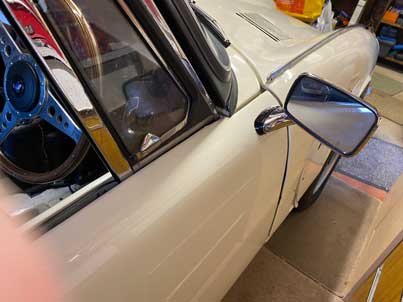
Today I continued with the installation of the passenger seat and its seat belt. The mounting bolt can be seen protruding into the wheel arch below. I also refitted the wing mirror to make the car legal!

I contacted Foregate Garage, and they're happy to check ther car over and adjust the front tracking. I'm just waiting for some dry weather!!
Thursday 19th May 2022
Today I took the car to Foregate Garage in Chester (I have been a sort-of customer for years - the GT6 went there last in 1998) although my daily drivers tend to be main-dealer serviced. I asked them to check it over (particularly the gearbox/overdrive mounting nuts that I had difficulty in tightening from under the car). Unfortunately they couldn't do the front wheel alignment as the equipment they had wouldn't fit, so I ordered a tool to do it from Demon Tweeks in Wrexham. On the way home I was given a thumbs-up by a Mazda MX5 driver!
The car has lots of get-up-and-go but at low speeds is a bit jerky. It can stall - I suspect that there is a fuel starvation problem (it takes ages to start from cold on a new day), either the pump or filter or carburettor.
Monday 23rd May 2022
I phoned Foregate Garage as I hadn't received the promised invoice. I was told that as they had't spent a great deal of time on the car, there would be no charge. How nice is that!! One thing they did was try to tighten the steering wheel, but it still seemed loose. First, when I tightened it myself the wheel boss (Moto-Lita) touched the column. I then adjusted the clamp at the bottom of the column, which gave more clearance. Then, with the help of a M14 washer under the steering wheel nut, it tightened nicely.
The Trackace Laser Wheel Alignment Gauge arrived from Demon Tweeks.
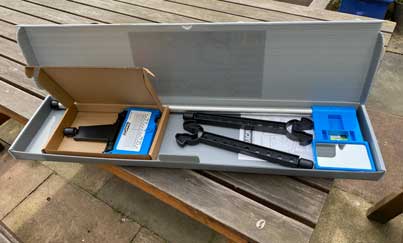
To see a YouTube video on its use click here
Friday 27th May 2022
I tried to set the front wheel alignment with the Trackace (as above). However the laser is not incredibly bright, and as it was quite bright, I had to give up as it was very difficult to see the laser.
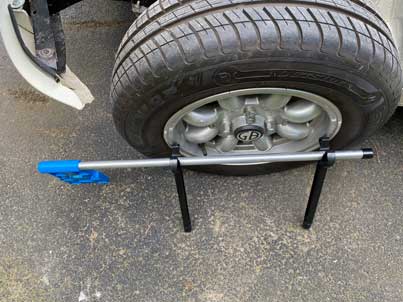
Following the instructions I set up the laser part (see above right) the distance from the o/s front wheel using the bar supplied. I then set up the bar, supports and mirror on the n/s front wheel (as above left), using the spirit level. Turning on the laser I moved it until I could see it in the centre of the mirror. At first I couldn't see the laser at all, but adding appropriate shading with cardboard, I managed it.
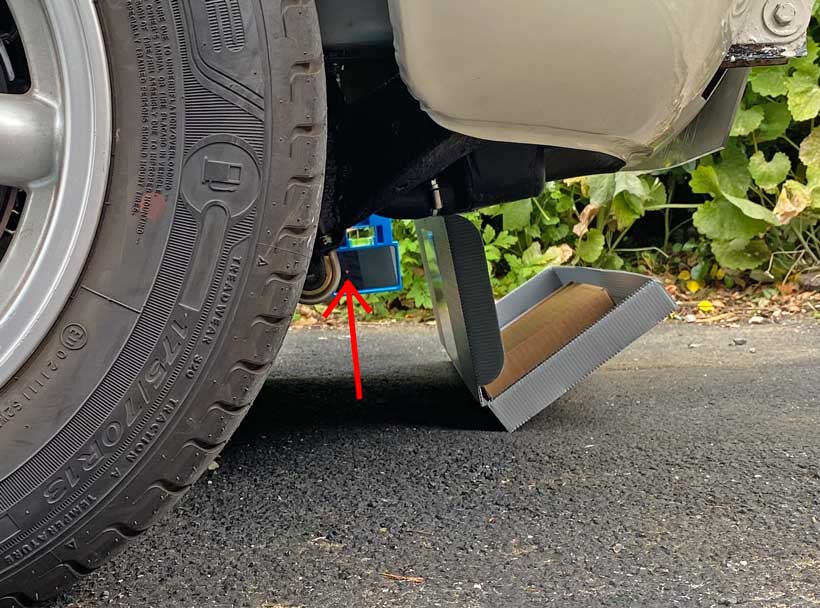
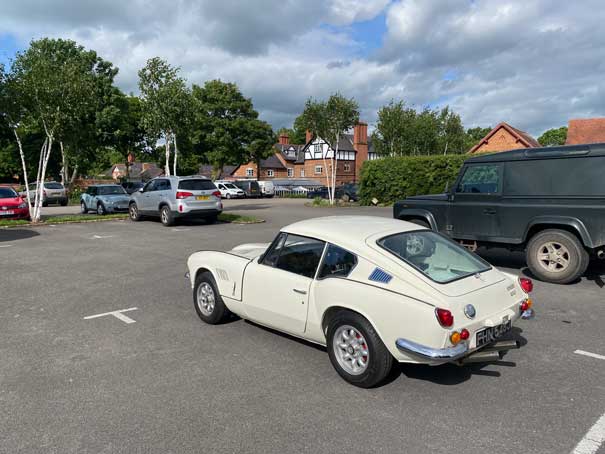
The arrow shows the laser dot which is very faint! The next stage uses the mirror to reflect the dot back to the scale on the laser unit - here I gave up as there was far too much ambient light to see the dot! Ideally this would work best in a garage, but unfortunately mine is too small. The only alternative is to do it at dusk. I then took the car to the filling station and put in a couple of gallons. It kept stalling when stopped, so I went home and increased the idling speed. I then did a longer journey to the Grosvenor Arms at Aldford (about 4 miles away). It went ok but the accellerator didn't need touching as it was revving up excessively! On getting back home, I reset the idling speed and generally the car seemed to run much better, without stalling at junctions. Perhaps all the car needed was a blast down the road to clear out the cobwebs (or more likely dirt in the fuel). Below in the Grosvenor Arms car park.
Saturday 28th May 2022
Today it's Steves Birthday Do, at Hawarden Castle Pavilion. To prepare the car, I first installed my old TomTom sat nav.
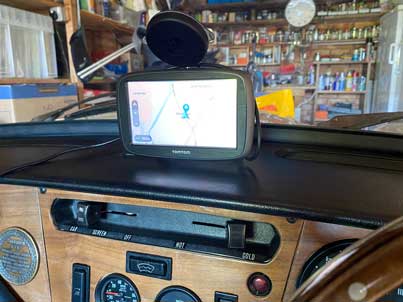
The reason for this is that the speedometer is wildly inaccurate (showing about twice the actual speed) so, as I don't use the TomTom any more, and as it displays the actual speed I thought it would be useful. Second, I adjusted the front tracking using the compass on my iPhone. As I knew it was toeing out, not in, I first adjusted the n/s tie rod until the front wheels were parallel (i.e. they both pointed in the same direction). I then turned the tie rod 3/4 a turn in the same direction, to give it a slight toe-in (the specified value is 0 - 1.5mm). This is a bit rough and ready, and I will try again with the Trackace when conditions allow. I then drove to Hawarden. I stopped at Sainsbury's filling station on the way to put in a bit more petrol. When I went to start the car again, it was completely dead, even the horn didn't work. This was rather a surprise, as it had never happened before! I apologised to the driver of the car behind me, and lifted the bonnet to check the battery terminals were tight (although I had no tools with me). I made sure the battery cut-off wheel was tight, put the bonnet down and it started immediately! The car cruised at around 60 mph along the A55, but the engine wasn't very smooth (although the overdrive worked well). When I arrived at Hawarden the engine ran on for a few seconds.
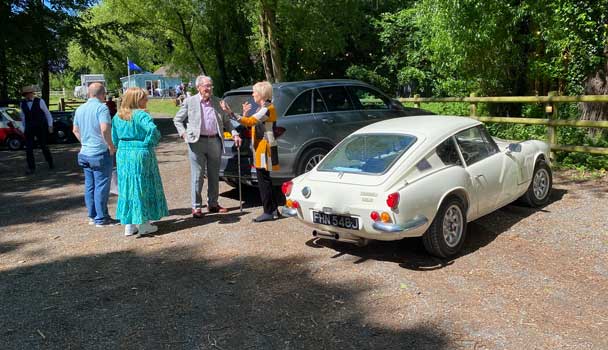
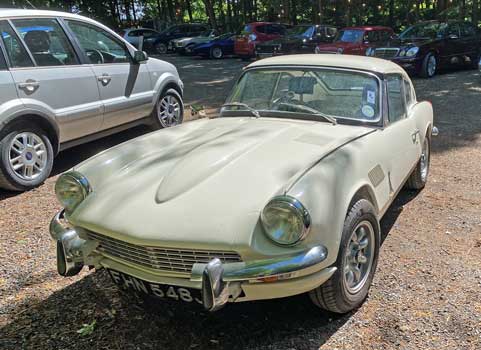
Above, with the car is Steve's wife Linda (closest to the car). Below another view, with some other "classic" cars in the background.
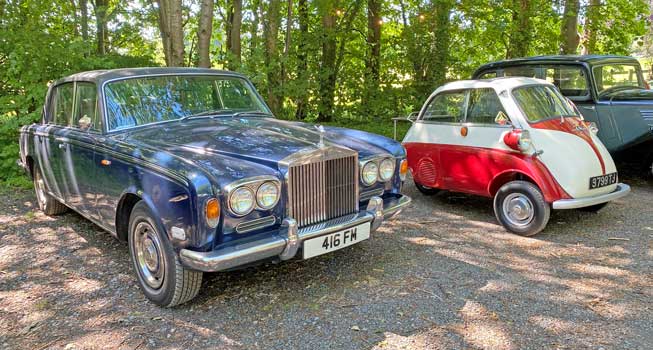
Steve's Rolls Royce, a lovely bubble car, and a bit of Steve's Wolseley.
Wednesday 1st June 2022
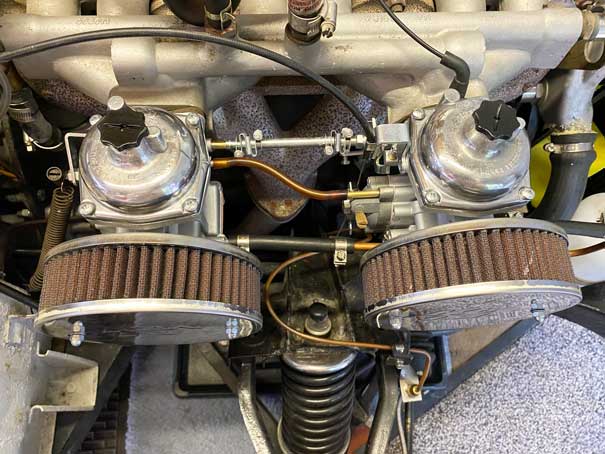
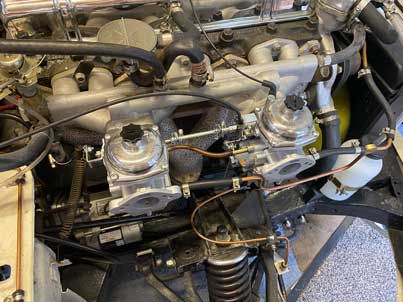
With the car running so badly, I suspect the carburettors, and as these haven't been touched for years I contacted Andrew Turner - Carburettor Specialist, as he claims to have over 25 years of experience as seen in Triumph world and 'The Courier'. He was willing to recondition them for a reasonable price, so I therefore removed them and put them in the post (seen below just prior to packing). Apart from the dashpots (which were blasted a couple of years ago) they are pretty grubby, and when I emptied the fuel out, it only came out of one carburettor! I was advised many years ago by Tony Lindsey-Dean to upgrade to CD175s (from a TR4) but as I have quite enough performance and economy I decided not to go down this route.

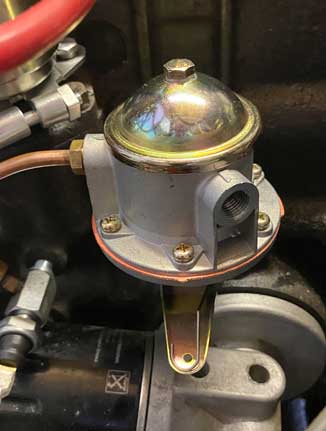
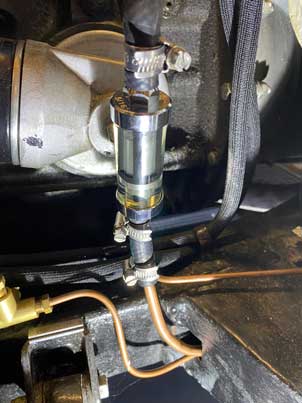
I've also ordered a new fuel pump from ANG Classic Car Parts with an ethanol proof diaphragm for E10 petrol (see below). I also ordered a new Aeroline branded fuel filter (also below), as the current one is a sealed unit and may be clogged with dirt. The vendor (BB Classics) assured me that the one I bought was E10 Fuel friendly, so hopefully my entire fuel system will be resistant to the ethanol in the upcoming fuels available. It is also glass, so I can see how clean or otherwise it is.

Wednesday 22nd June 2022
I've been very busy working on our house, so not touched the GT6. As regards the carburettors I've read some negative reviews on Andrew Turner, but as these may be non-representative (or even malicious) I will document my experiences here. So far I was quoted on the 31st May a very reasonable price and given a lead time of 6 weeks. I posted them and received an acknowledgement of receipt on 4th June from Carole. On 16th June I requested an update on progress, and on the day after Carole replied "Yes they are at our bead blasters and platers at the moment". When I posted them I enclosed a note asking for some photos, as well as reassurance that ethanol resistant materials would be used. I requested that the Hydrin diaphragms be reused or replaced like for like as these are E10 resistant.
Friday 8th July 2022
Today I received the carburettors from Andrew Turner - they look brand new!
As requested, he refitted the HYDRIN diaphragms, as these were fairly new (Hydrin reduces the effect of modern fuels on classic parts). He also supplied a new set of rubber diaphragms as presumably these were included in the rebuild kit in any case, as well as a set of gaskets (in the Zenith box in the picture above). Sadly my request for photos only elicited a similar photo to mine above, wheras I wanted images of the disassembly/reassembly process. Also my question as regards the resistance of the other components (e.g. the floats) as to their resistance to E10 fuel were not answered. However I reserve final judgement as to whether I can recommend Mr Turner until the car runs again.
Monday 12th July 2022
Today refitted the carburettor to the car. I refilled the dashpots with oil (3-in-1). I won't try to start the car until I have also replaced the fuel filter and fuel pump - see 1st June blog.
Saturday 16th July 2022
Today fitted the new fuel pump (the ibiquitous "Powertune" brand, probably made in China).
However when I went to fit the fuel filter I found that I had bought the wrong one - with 1/4" 6mm inlet and outlet pipes wheras they actually need to be 5/16" 8mm!
I then ordered the correct one. I refitted the old filter, but as loads of petrol syphoned from the rather full tank into my drip tray, I had to carefully put this into my fuel can (it was fortunately clean). I decided to leave starting the car to another day, as I'd prefer not to do this until the smell of petrol has dissipated!
Sunday 17th July 2022
Today I got the car running! However I had to switch the ignition off quickly as it started to rev too much. Further investigation showed that the throttle lever (to which the accelerator is attached) was the wrong way around - the correct way in the second picture below:
Presumably Andrew Turner assembles carburettors for many different applications, so I'll give him the benefit of the doubt, it only took a couple of minutes to turn it around, although I had to use an adjustable spanner as all UK carburettor parts are BA sizes.
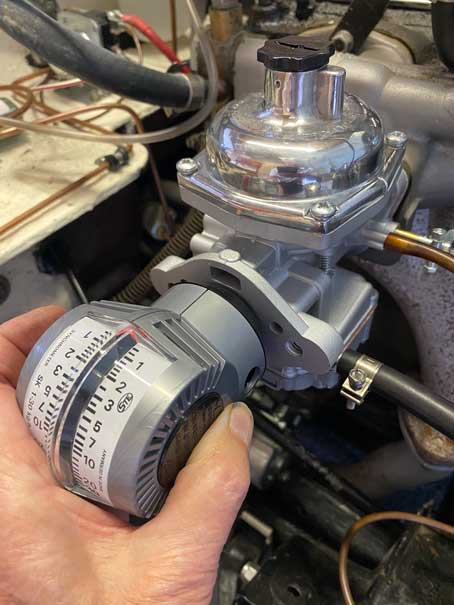
I tried to synchronise the carburettors with a length of rubber tubing as Iain Tyrrell famously does with Webers. However before I even started both carbs sounded exactly the same, so I ordered a STE synchrometer.
Monday 18th July 2022
Received Synchrometer (made in Germany by Schütte & Tanaskovic Engineering). However it needs an adapter to work properly on Strombergs which I've just ordered.

It's probably the hottest its ever been here in Chester. The thermometer in the back garden is registering 39.6 degrees C (at 17.00 hrs) so I'm not working on the car!
Thursday 21st July 2022
I fitted the new fuel filter.
After receiving the Synchrometer adapter I set about tuning the carburettors:-
When the engine had been warmed up, I first disconnected the linkage between the carburettors and adjusted the tickover for each carburettor to around 700 rpm using the Syncrometer. I found a setting of about 7 for each carburettor seemed to work best. I then retightened the linkage and adjusted the mixture of each carburettor by turning the mixture adjusting screw clockwise (looking from the bottom) until lifting the piston slightly made the engine revs neither increase or decrease.
I then did a test drive to the Grosvenor Garden Centre.

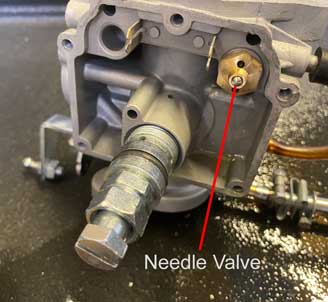
The car went quite well, I took it to around 62mph on the A55, using an old SatNav as a speedometer (the existing speedo fluctuates wildly and registers around 70 when I'm doing 50). When I got home I lifted the bonnet and found petrol pouring out of the rear carburettor. Before contacting Andrew Turner I found a slip of paper which said "All our carburettors are tested prior to dispatch, to test for correct functions of the needle valve and to ensure that there are no leaks. The majority of 'faults' involve flooding and this is almost always due to dirt from the fuel line or tank. To eliminate this we recommend that before connecting the fuel line, a little fuel is pumped into a glass jar to clear the pipe of any dirt and also if possible fit a fuel filter. If flooding occurs remove the needle valve, check, clean and refit".
When I renewed the fuel filter I must have disturbed something. As I intend to fit stainless steel heat shields, when these arrive I'll remove the carburettors to check the needle valve in the front one's float chamber, and refit. Hopefully this will cure the problem. I'm not sure heat shields are strictly necessary, but feel that if further flooding occurs it will stop fule dripping onto the exhaust manifold!
Friday 22nd July 2022
I removed the carburettors and dismantled the front float chamber to clean the needle valve - I did this by unscrewing it, blowing throgh it, and replacing.
The heat shields were then fitted and the carburettors refitted.
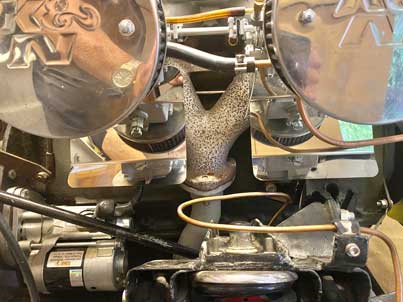
On running the engine after this, the flooding has stopped.
I then turned to continueing with the interior carpet. The velcro I attempted to stick to the carpet failed, so I will try to sew it on with black thread!
Sunday 28th May 2023
After a ridiculous amount of time I have resumed work on the GT6! The reason for the inactivity is complicated, so I won't go into it here. First I removed the winter cover.
Next, after tidying the garage I came across a box with all the stuff to refurbish the centre arm rest (from Park Lane Classics). To make more room, the best thing would be to complete this job first. I stripped the foam etc from the metal inner, cleaned off the old adhesive, sanded it and repainted it. A bit over-the-top I know as it won't be seen. Below is the restored metal inner and all the bits from Park Lane for the refurbishment.

Monday 29th May 2023
Today I got the car out of the garage.
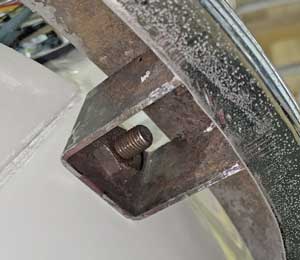
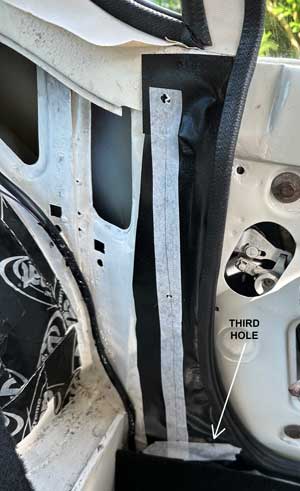
I started by looking at fixing the LH rear quarter panel while the car was out (the door needs to be open so I can't do this in the garage). First, there didn't seem to be enough holes to fix the B post clips - I surmised that these need to be 1/4 inch in diameter (or around 6.5mm). There should be three by the B post (looking at the panel, but I could only find 2! I therefore needed to find the position of the third lower hole, so I can drill it. Presumably some new panels have been fitted (or pieces welded in) without the requisite hole. I didn't have the right drill so I ordered one from Amazon, and marked out the position of the third hole (see pictures below).
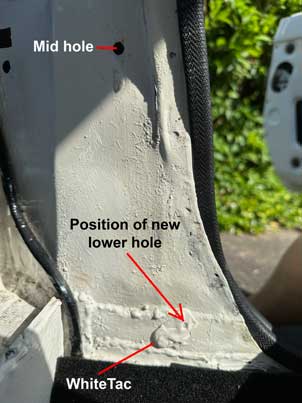
Sunday 4th June 2023
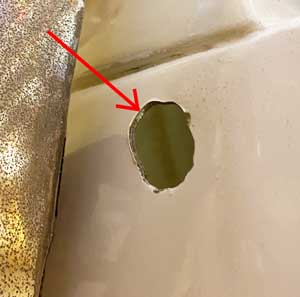
Today I got the car out of the garage and continued with fitting the rear LH quarter panel. First, I abandoned the method above, and started again by fitting the clips to the new panel and offering it to the car. I put a thin layer of WhiteTac in roughly the position of the lower hole (missing through a patch panel being welded on) and used the clip to indicate the position of the new hole (see below). I had previously removed the black vinyl layer, attached to prevent any white bodywork showing as the fit of the new panel was not as it had been previously!
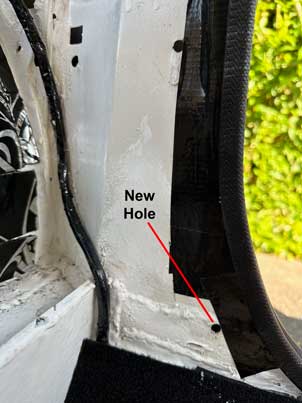
Below is the new hole drilled (1/4" or 6.5mm) and the re-addition of black vinyl.
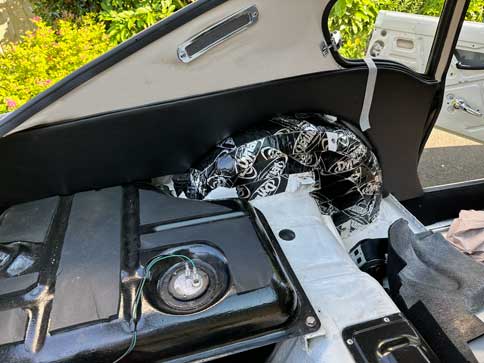
The panel is now in position, although not yet fitted. Before this, the carpet needs to be fitted over the wheelarch, with holes being made for the seat-belt mounting to be attached.
After doing various jobs on the house (which take priority), I have continued to prepare the car for the rear quarter panel. Unfortunately I can't get the trim clips to go fully into the holes so they are secure - they just come out! As previously Triumph components can be of variable quality I have ordered some from Rimmers, whose quality has previously been good, even if a little dearer.
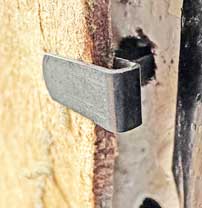
Above is a trim clip fitted to a bit of old trim hardboard showing that it won't stay in its hole, it just pops out. Also the carpet is far too big for the wheelarch.

![]()